Master Bath Vanity Refinish & House Progress
Hello blogland, checking in with a Friday progress report!

I've been working behind the scenes (talking to contractors, ordering products, planning and scheduling, etc) so that everything runs smoothly *fingers crossed* when it all kicks into high gear. But there hasn't been much visible change in the home renovation lately, which explains the lack of posting.
On that note, you may notice things start to shift here. With all of the changes I've experienced in every facet of my life in recent months, a lot of evaluating and re-evaluating has taken place. While I've committed to being more open to new paths and exploring many options, I'm finally headed in a direction that feels very right. Decisions have been made and plans put into action… and I can't wait to take you along on this new journey with me as it unfolds.
One of these decisions has been aiming to connect with you more through social media channels to fill the void between posts. There's something exciting and more personable about real-time content sharing, and I'm always active there, for those of you who have been wondering where I've been!
Instagram has always been my favorite platform..

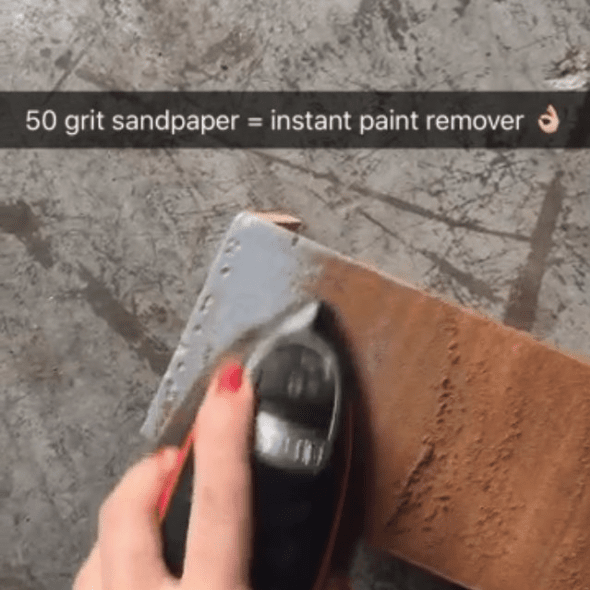
I recently joined Snapchat as well, and it's been fun to share the day-to-day moments in my life. Bonus: the videos make it so easy to share live DIY projects in action—much quicker than hours spent photographing, editing & writing a tutorial post! Make sure to follow me if you're active:

While we're on the subject of sharing, I spotted my guest bathroom in Country Living Mag's Jan/Feb issue a few days ago!
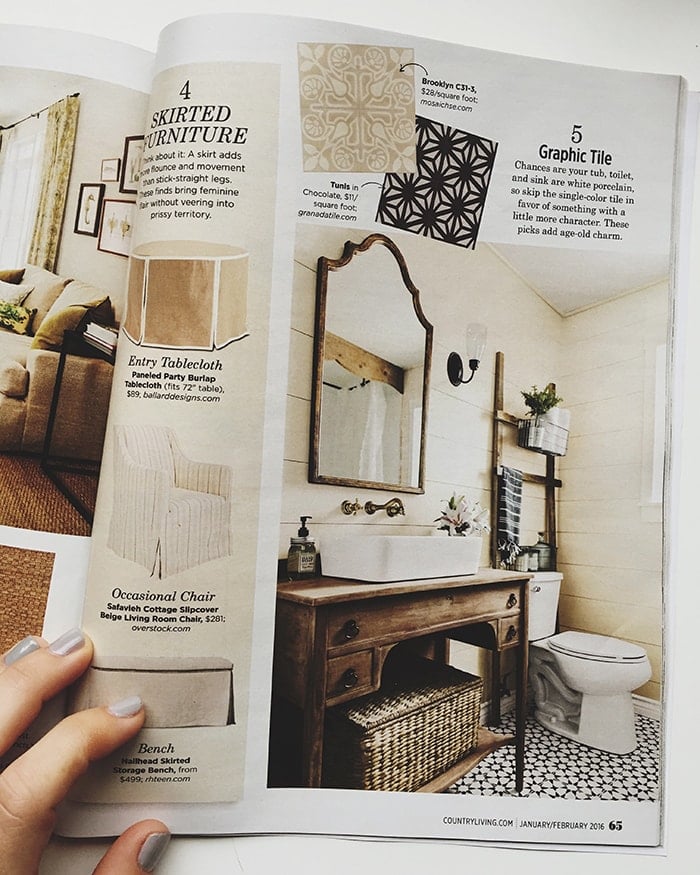
I can still remember the numbness and pain in my legs after 2 straight days of tiling that floor. It was truly a labor of love and it's such a great feeling to know that the efforts paid off.
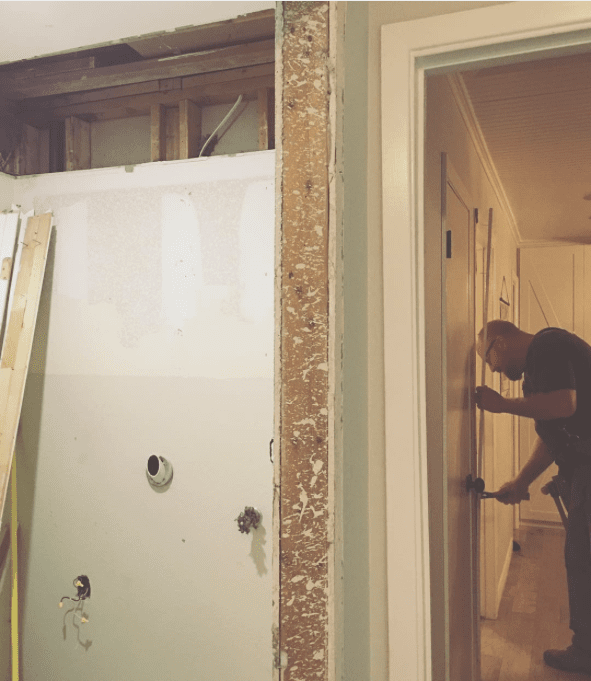
And now I'm back in the trenches again with another bathroom remodel. Last week my demo guy came over to take care of a few quick fixes around the house. The door to the bathroom and the old laundry room are no longer needed, so he removed and reframed the openings with fresh trim.
Let's talk about this old laundry room for a second. When we first moved in it looked like this:
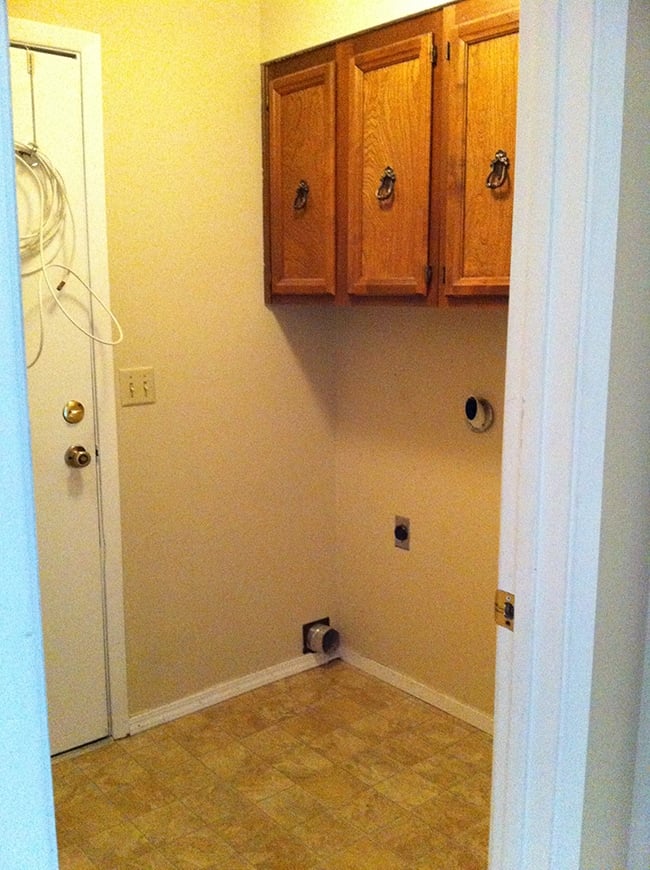
We kept our washer/dryer in there until creating a new laundry room downstairs, then removed the cabinets and left it as a storage area for a while. The master bathroom is on the other side of the back wall, so the original plan was to move that wall in to gain space in the bathroom. Financially it didn't make sense though, so Plan B is to create a purposeful, built in storage/desk/command center area from it. The door leads to the garage so it's the perfect place for a drop-zone, and you can never have too much storage in a house, right?
Here's what it looks like at the moment:
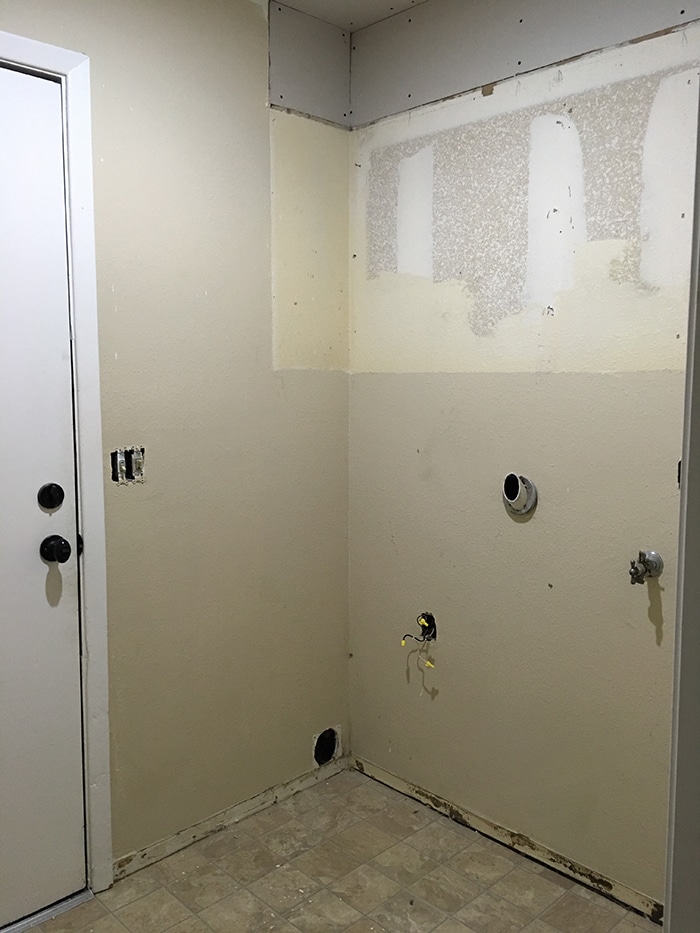
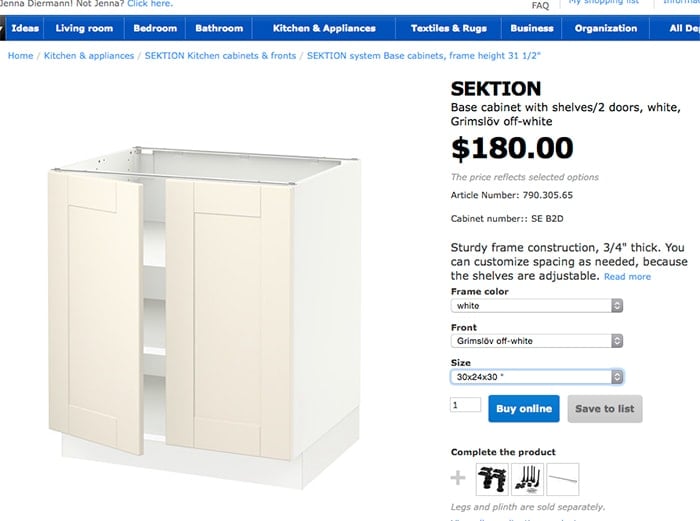
On Monday the plumber is coming by to remove the fixtures so we have a blank slate to work with. And tomorrow, the goal is to head to Ikea to pick up two of these upper cabinets…

Along with one lower cabinet…
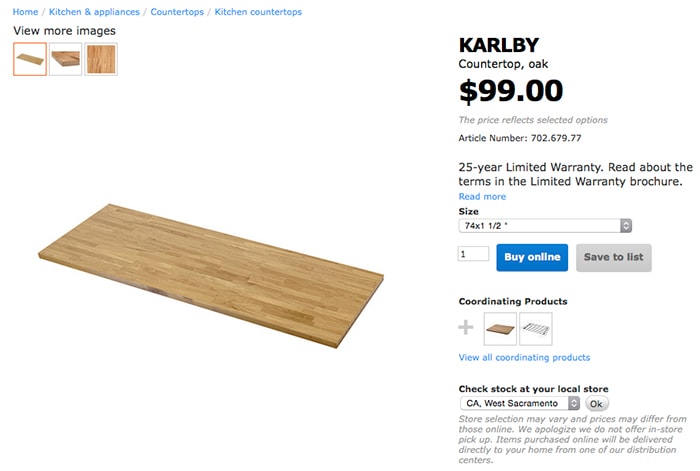
And a countertop:
I may change my mind on the exact style once I'm there in person, but I want to keep it simple and bright. I'll have a neutral, affordable tile floor installed, paint the walls and door, add a few organizational accessories and hopefully end up with a big bang for my buck.
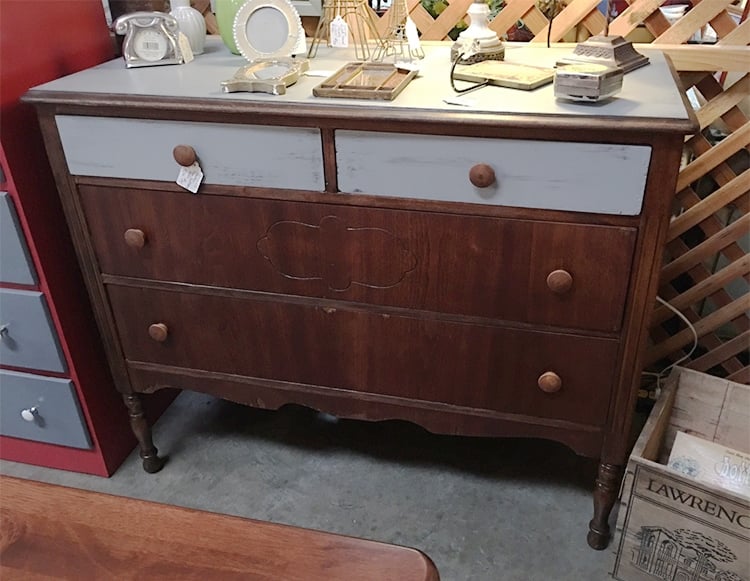
Now, back to the bathroom. In my last post, I presented the plan along with a design board which still has the green light. I found a dresser at a local thrift store and have spent the last couple weeks slowly transforming it.
Here's how it looked when I spotted it in the store:
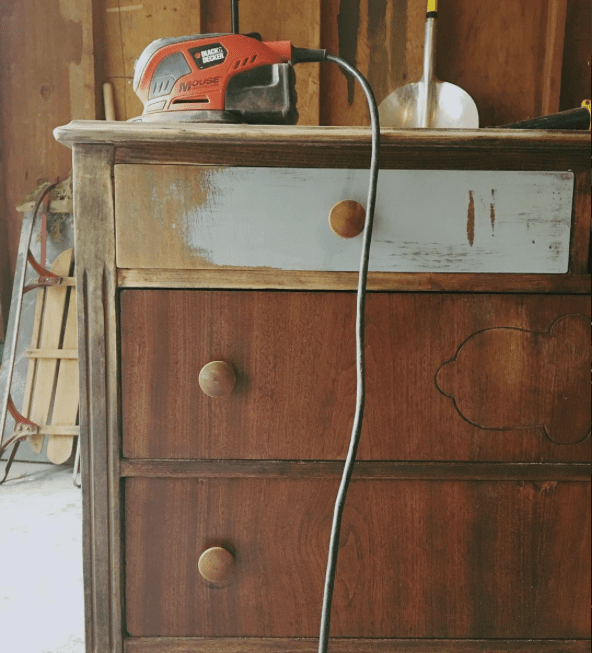
Then after I began sanding the old paint and varnish away:
Of course if you're on instagram and/or snapchat, you may have seen the videos in real time!
And after sanding…

I loved the way my guest bathroom vanity turned out, and this dresser was built very close to the same way so I knew I could achieve similar results with my Maison Blanche products.
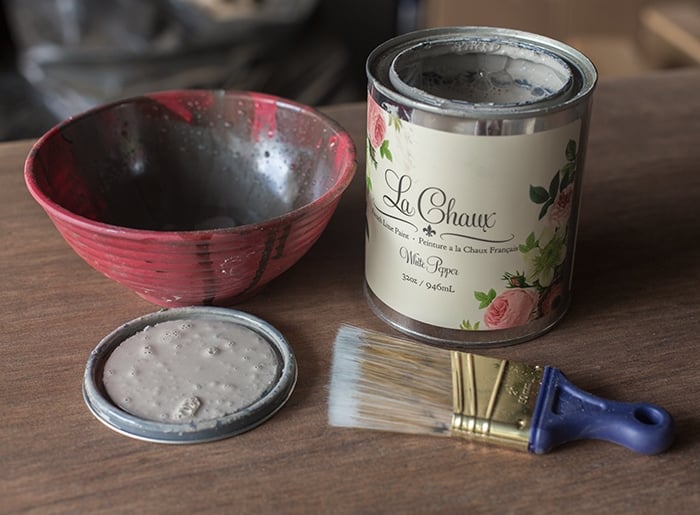
After sanding down to the bare wood, I grabbed my lime paint in ‘White Pepper', a good quality brush and a bowl with water.
Depending on the specific look you want to achieve, your approach will vary.
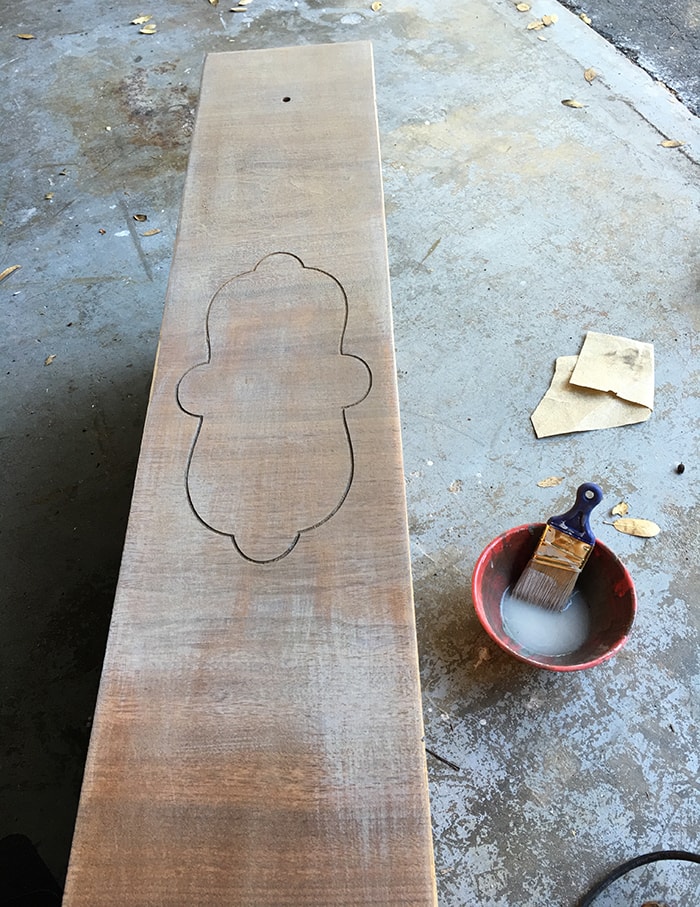
I first tested on an area that will be hidden under the sink:

Without using any water, I brushed paint onto the surface and then immediately rubbed it into the wood to let the grain show through. It was more concentrated (gray) than I'd like, which is when I began to mix the paint with water.
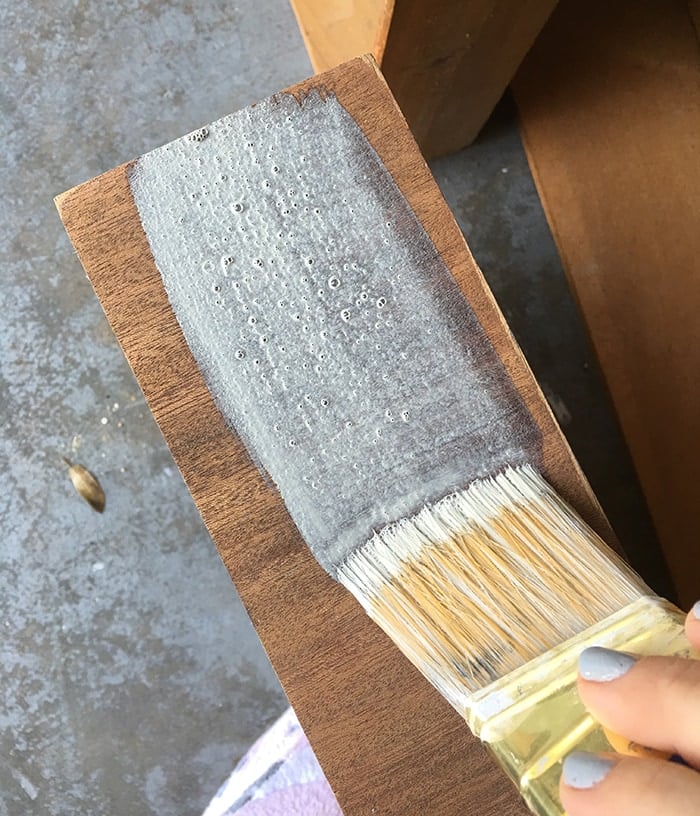
Use more water for a subtle/overall even look, or less for more of an aged look. After a couple seconds, I then buffed the mixture into the wood which let the lime paint settle into the grain and work its magic.
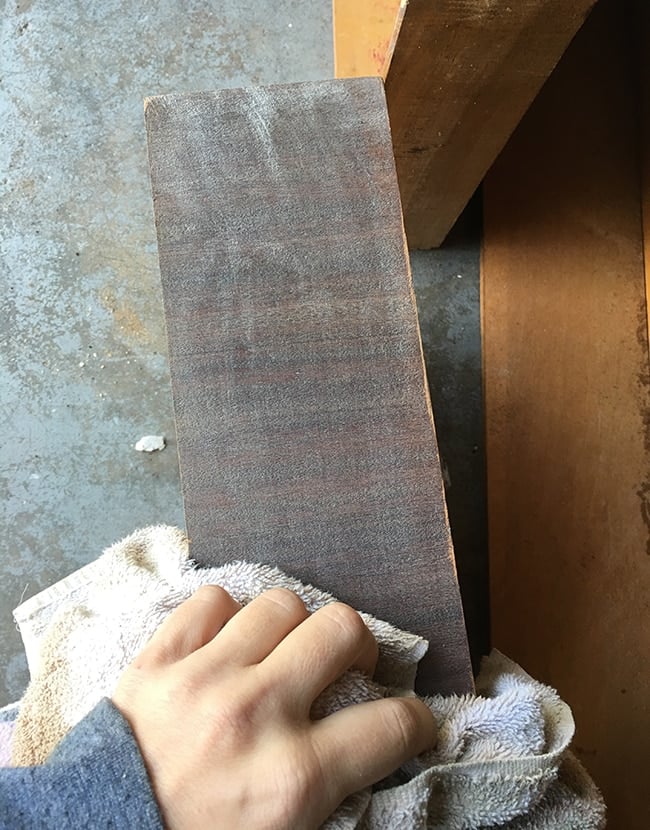
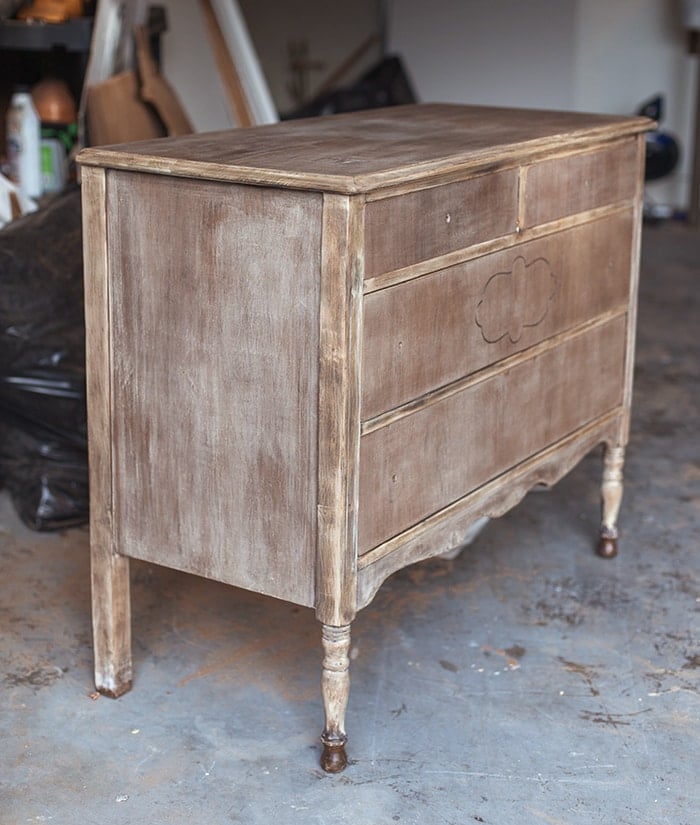
Once dry, it left a really pretty whitewashed effect.
Here's a before & after:
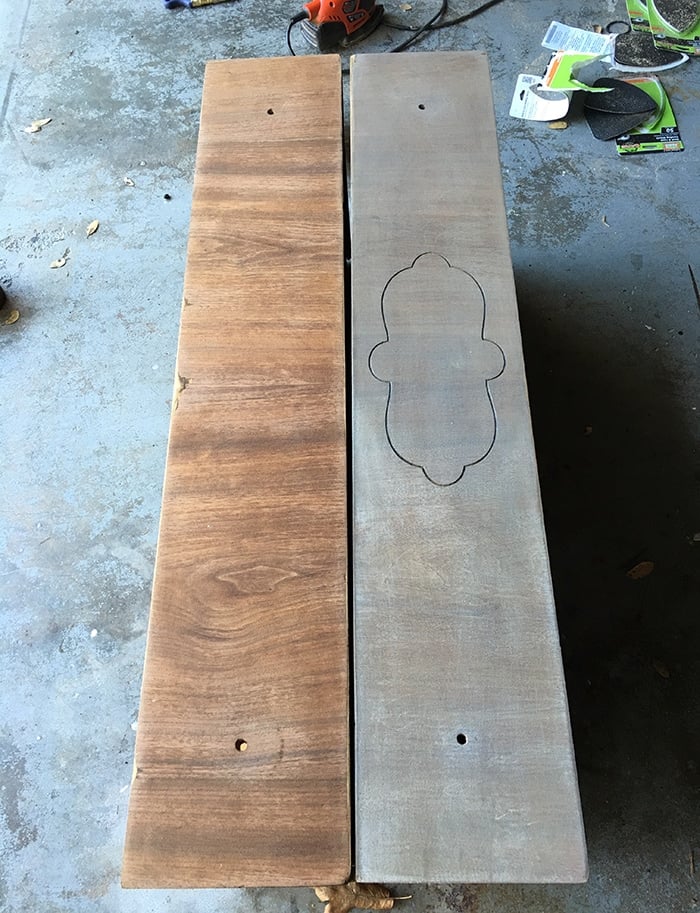
The drawer fronts, vanity top and sides all have a layer of veneer which will take stain differently than the solid wood frame of the piece. You can see how the real wood turned out a bit lighter:
This isn't necessarily an issue, it's just more of a personal preference. I dabbed a bit of medium wood stain onto a cloth and gently buffed it in to add some color back.
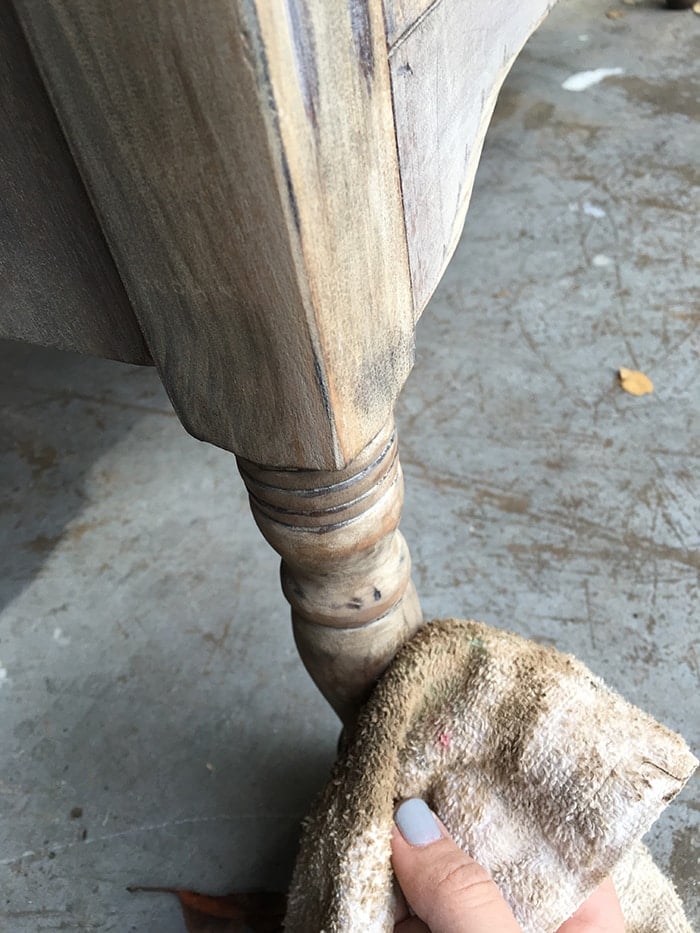
I know from experience that once any sort of sealant is added to exposed wood (poly, wax, varnish) the color deepens, so I went a bit lighter than what I had intended for the final product.
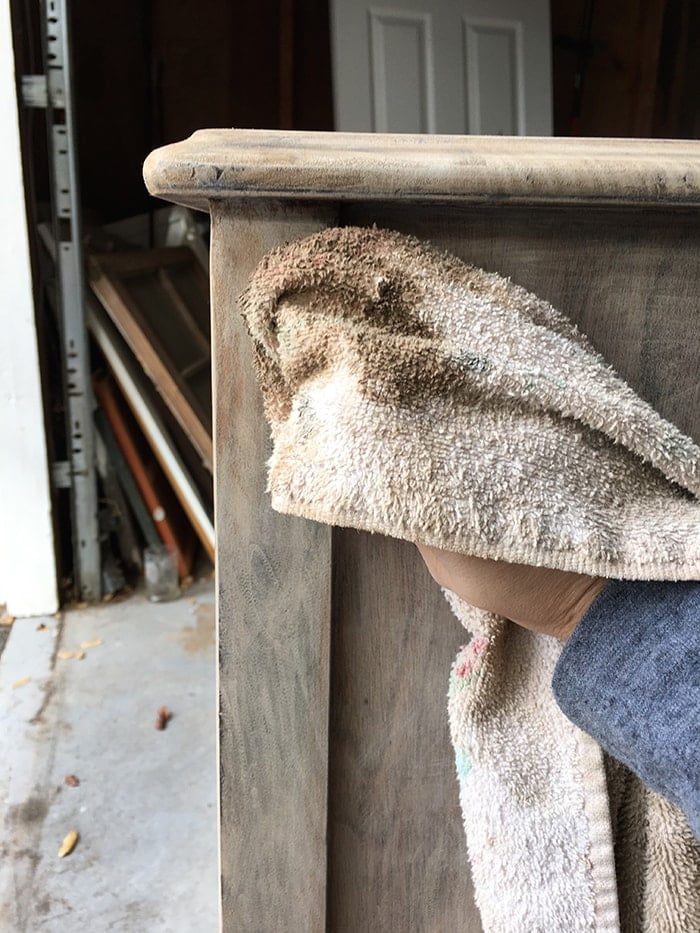
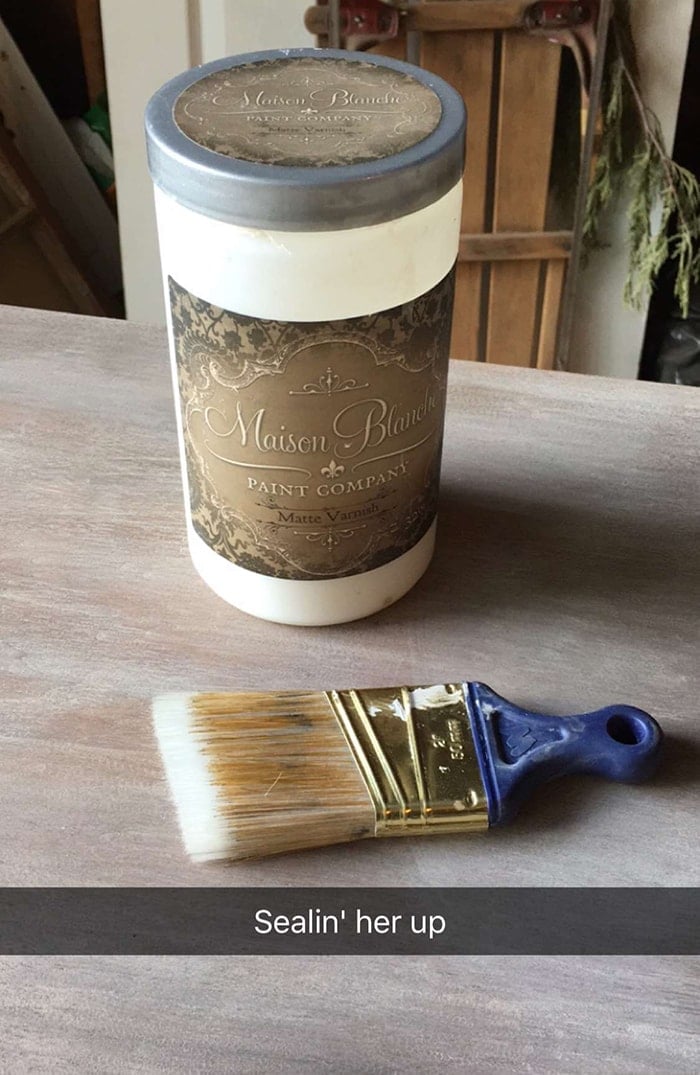
I've never been a fan of shiny wood, so to maintain the natural/aged look, I used Maison Blanche's matte furniture varnish again, which is undetectable once dry yet retains the protective properties of a standard varnish.
Here's a quick video to demonstrate this process, originally shared on Snapchat:
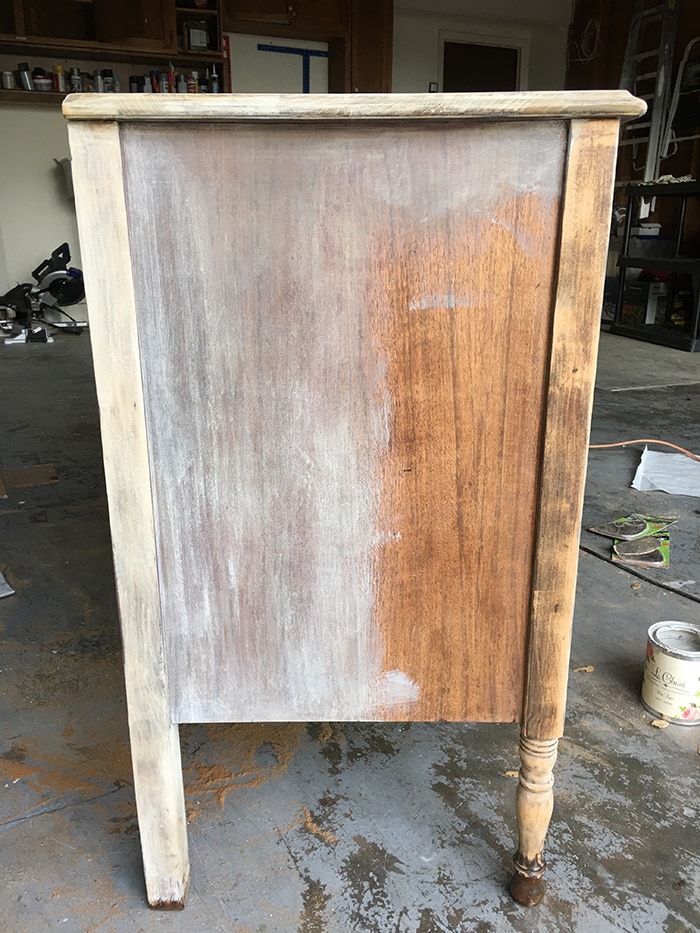
You can see how drastically the color changes! Fortunately, it does lighten as it dries but there is still a difference.
Maison Blanche recommends two coats of varnish, but because this vanity will be in a high traffic area with lots of water around, I gave it three coats. I'll do a water test and may even go back in and add a matte poly to be safe.
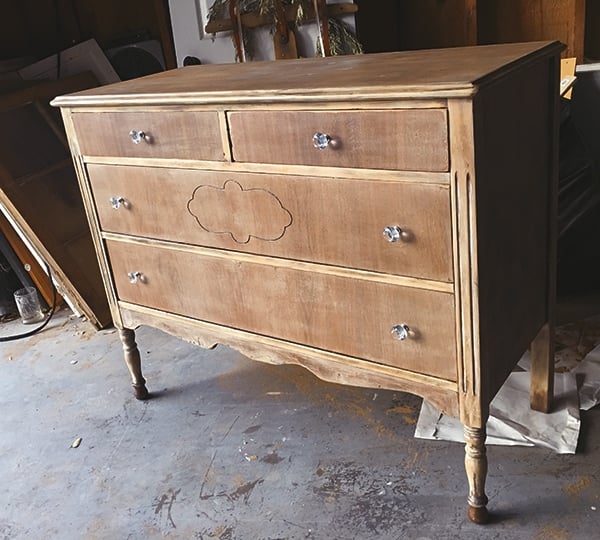
There's a lot of layers and tone to this finish so it's tough to capture it accurately, but here's how it all came together:
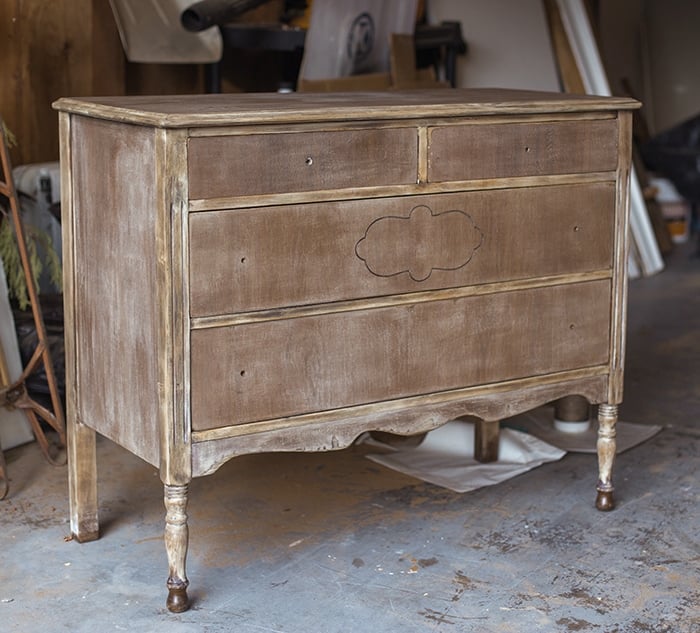
You can see the original finish at the very bottom—I left that alone because the dresser will have to be cut a few inches so it's the proper height after the sink is installed.
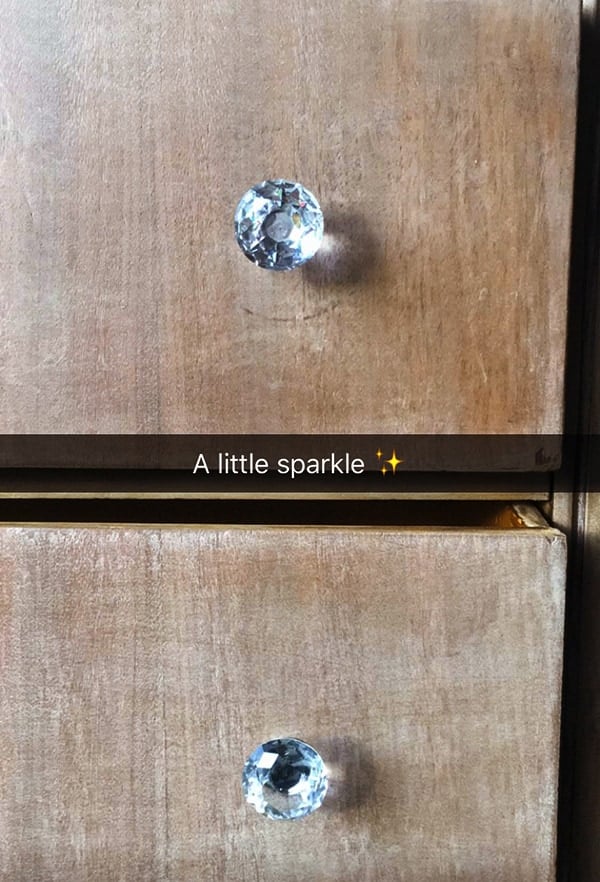
Just as I was finishing my last coat of poly, the mailman pulled up and delivered my new knobs! I wanted to dress it up a bit with some bling, so I found all five of these crystal knobs on Ebay for $4.92 shipped. I'm not even sure how that's possible, but I'm not complaining.
And now my portion of this dresser turned vanity is complete!
My plumber will finish the modifications when the time comes, and I can't wait to see it in the space. It feels great to cross this one off the list!
Over the weekend I'll be in renovation mode, with the goal of a successful Ikea shopping trip and a door makeover. Amidst all of this, I have some very exciting news next week—the first of some big changes in the works…

More to come soon,

posted by Bailee Davion @ 5:42 AM
0 Comments
![]()


0 Comments:
Post a Comment
Subscribe to Post Comments [Atom]
<< Home